 My Tools and Toolbox
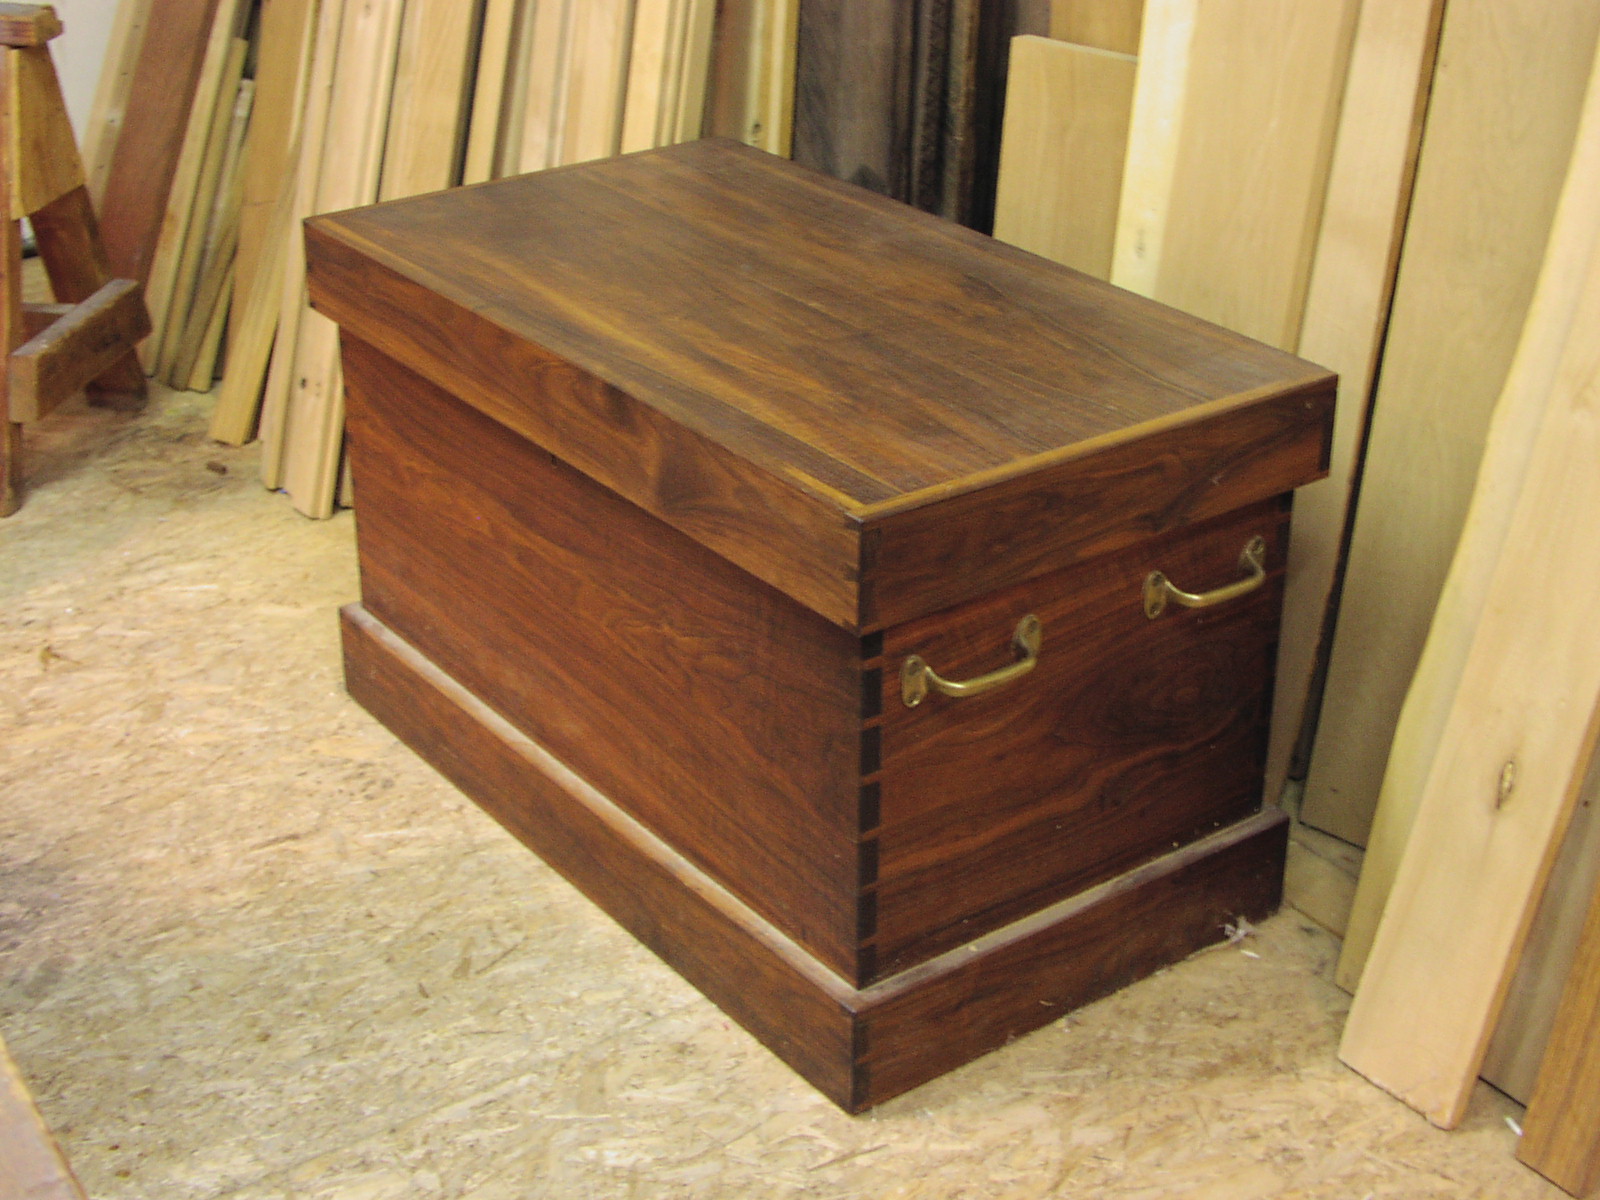
Everyone needs something to hold their tools. I use a traditional toolbox to hold virtually all of my tools. It is placed less than a step away from my bench for easy and convenient access. Tools are removed on an as needed basis, use it then put it away. There is no reason to leave it out if you are not using it.
 I once heard someone criticize this type of box because they felt it required too much stooping and bending to get at the contents. My only question for them is, why are they a woodworker if they don’t like stooping and bending?
At first glance my toolbox seems overly complex and people often wonder how I ever made it. I have to admit like a lot of things, it evolved with my needs. It was not the first tool chest I built, rather it is a refinement of two others I had previously made. The first was laid out wrong and the second had so many changes it was time to make a new one. And like the others, this box was designed from the inside out, the contents made most of the important decisions.
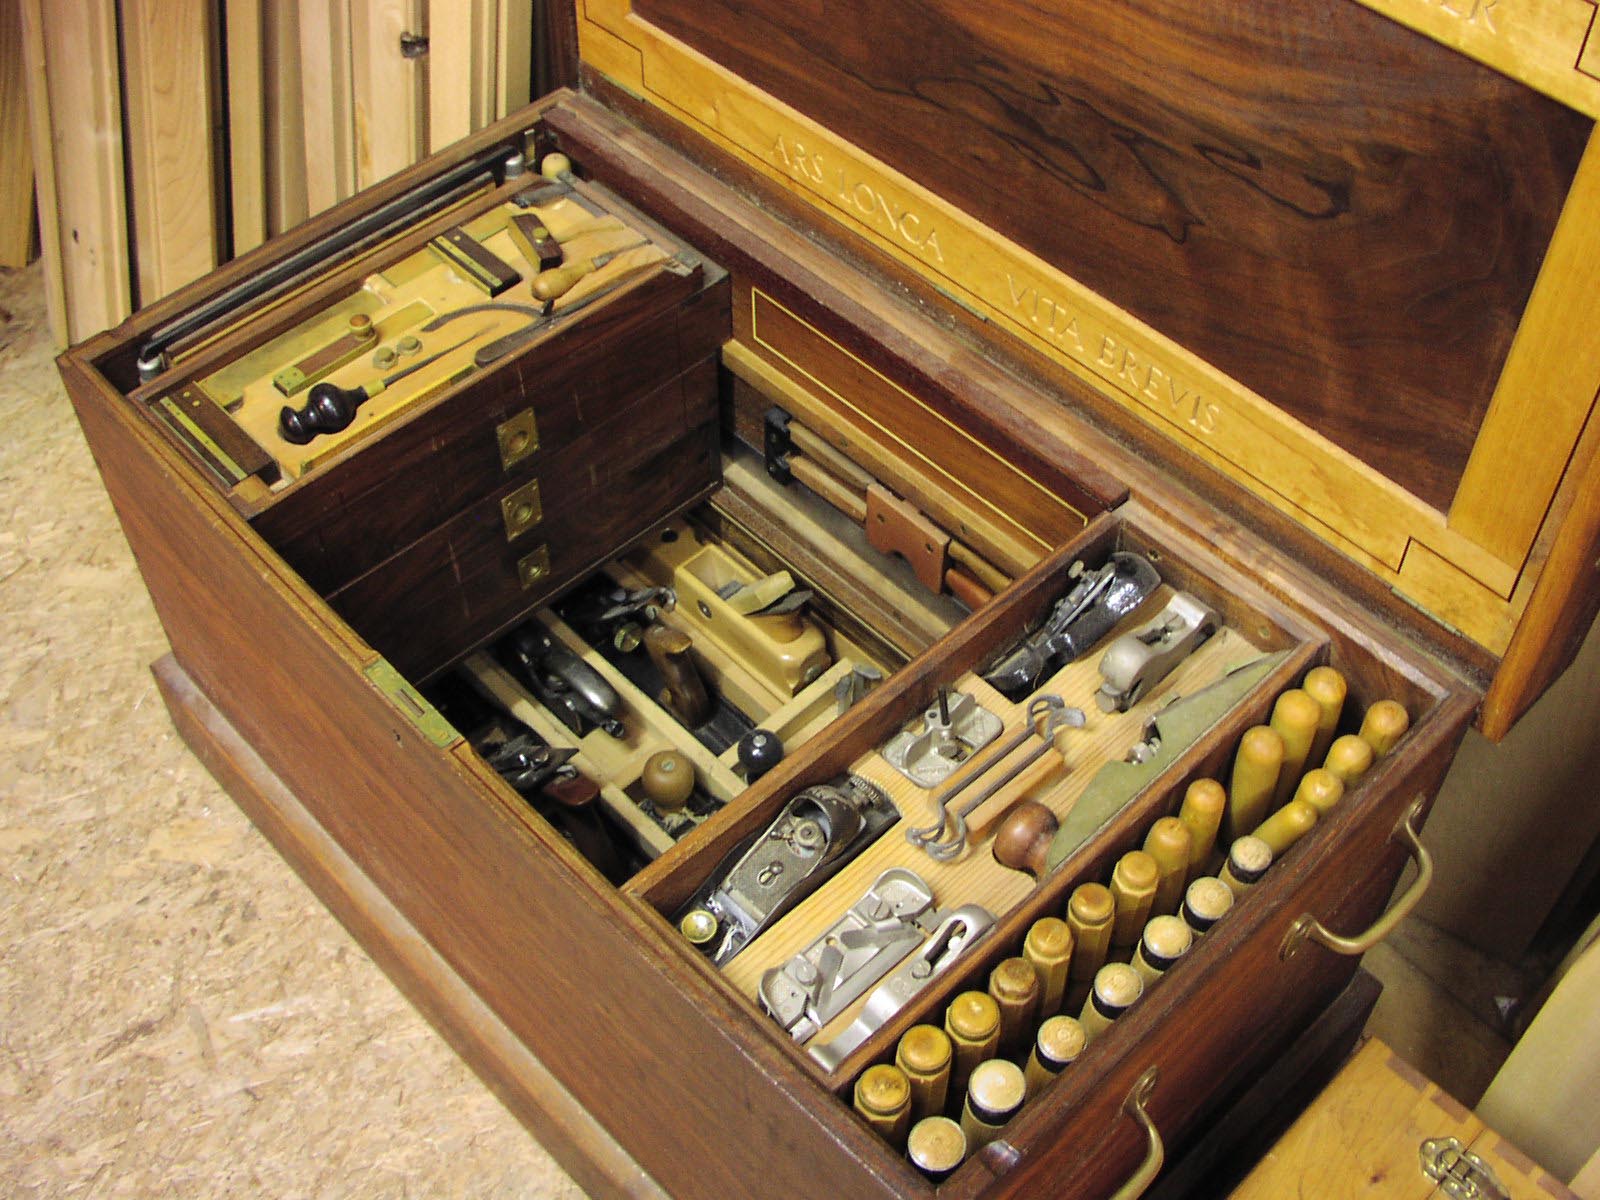
 There are over 400 tools in my chest and everything has a place. I can see at a glance if something is out of place or missing. Everything is available with a minimum need to move something else. I can get to anything quickly, with my eyes closed if need be. Accessibility of tools was the problem with my first chest.
Tool Box Layout
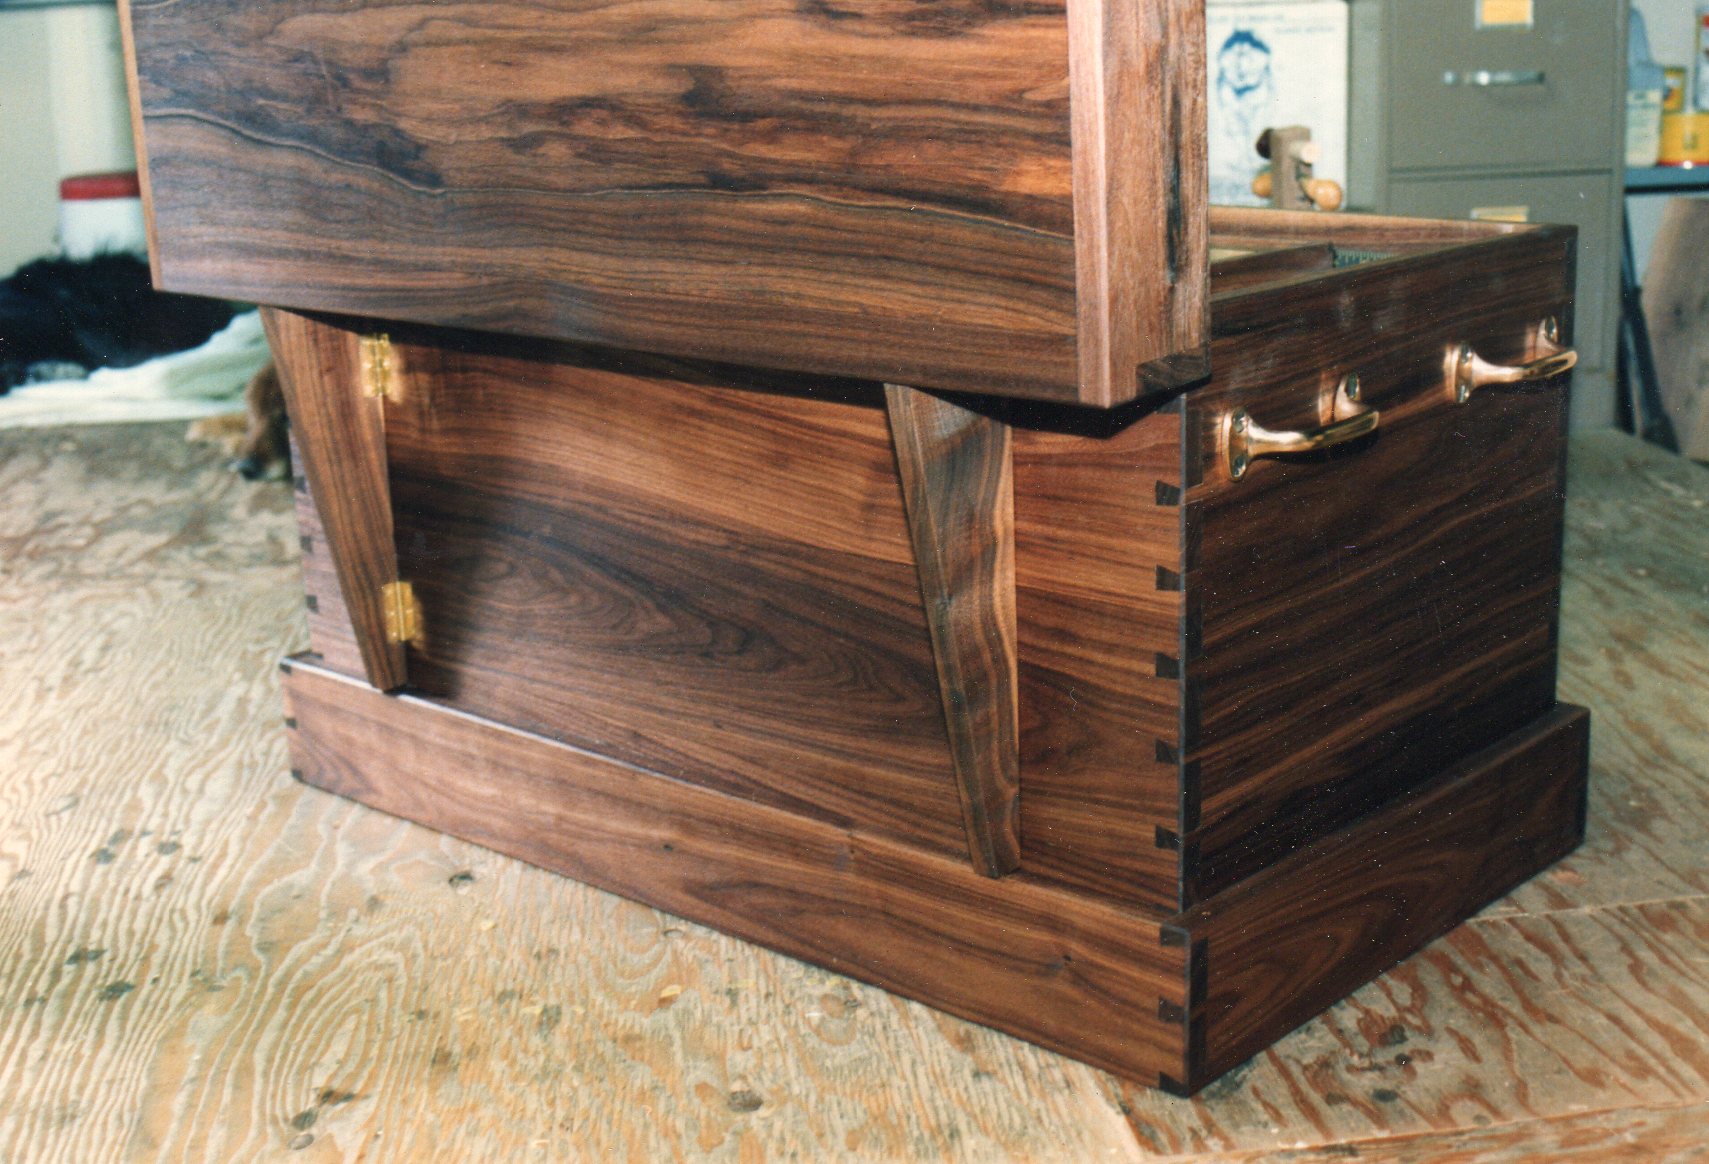
I like using a traditional chest, but I did make a few changes of my own to make it a little more usable. The tills inside the chest are laid out in a side-to-side arrangement rather than front to back. Front to back tills don’t work very well. I can’t explain just why cabinetmakers of the past did not think of this, as a side-to-side layout is far more practical and efficient. None of the trays and tills have lids. Lids look nice, but they are only a nuisance when I am working.
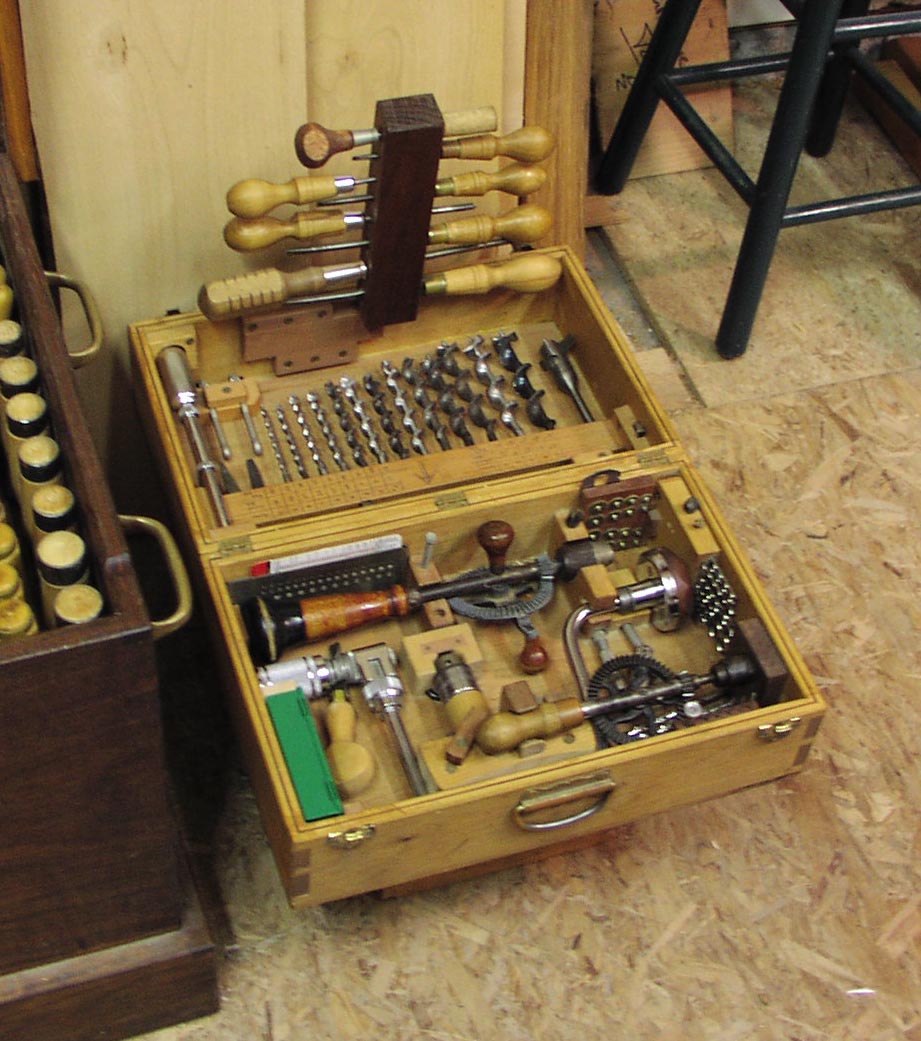 There are two small removable boxes between the tills that are removed when I start work and put back at the end of the day. One of the boxes holds all of my drills and the other holds assorted odds and ends.
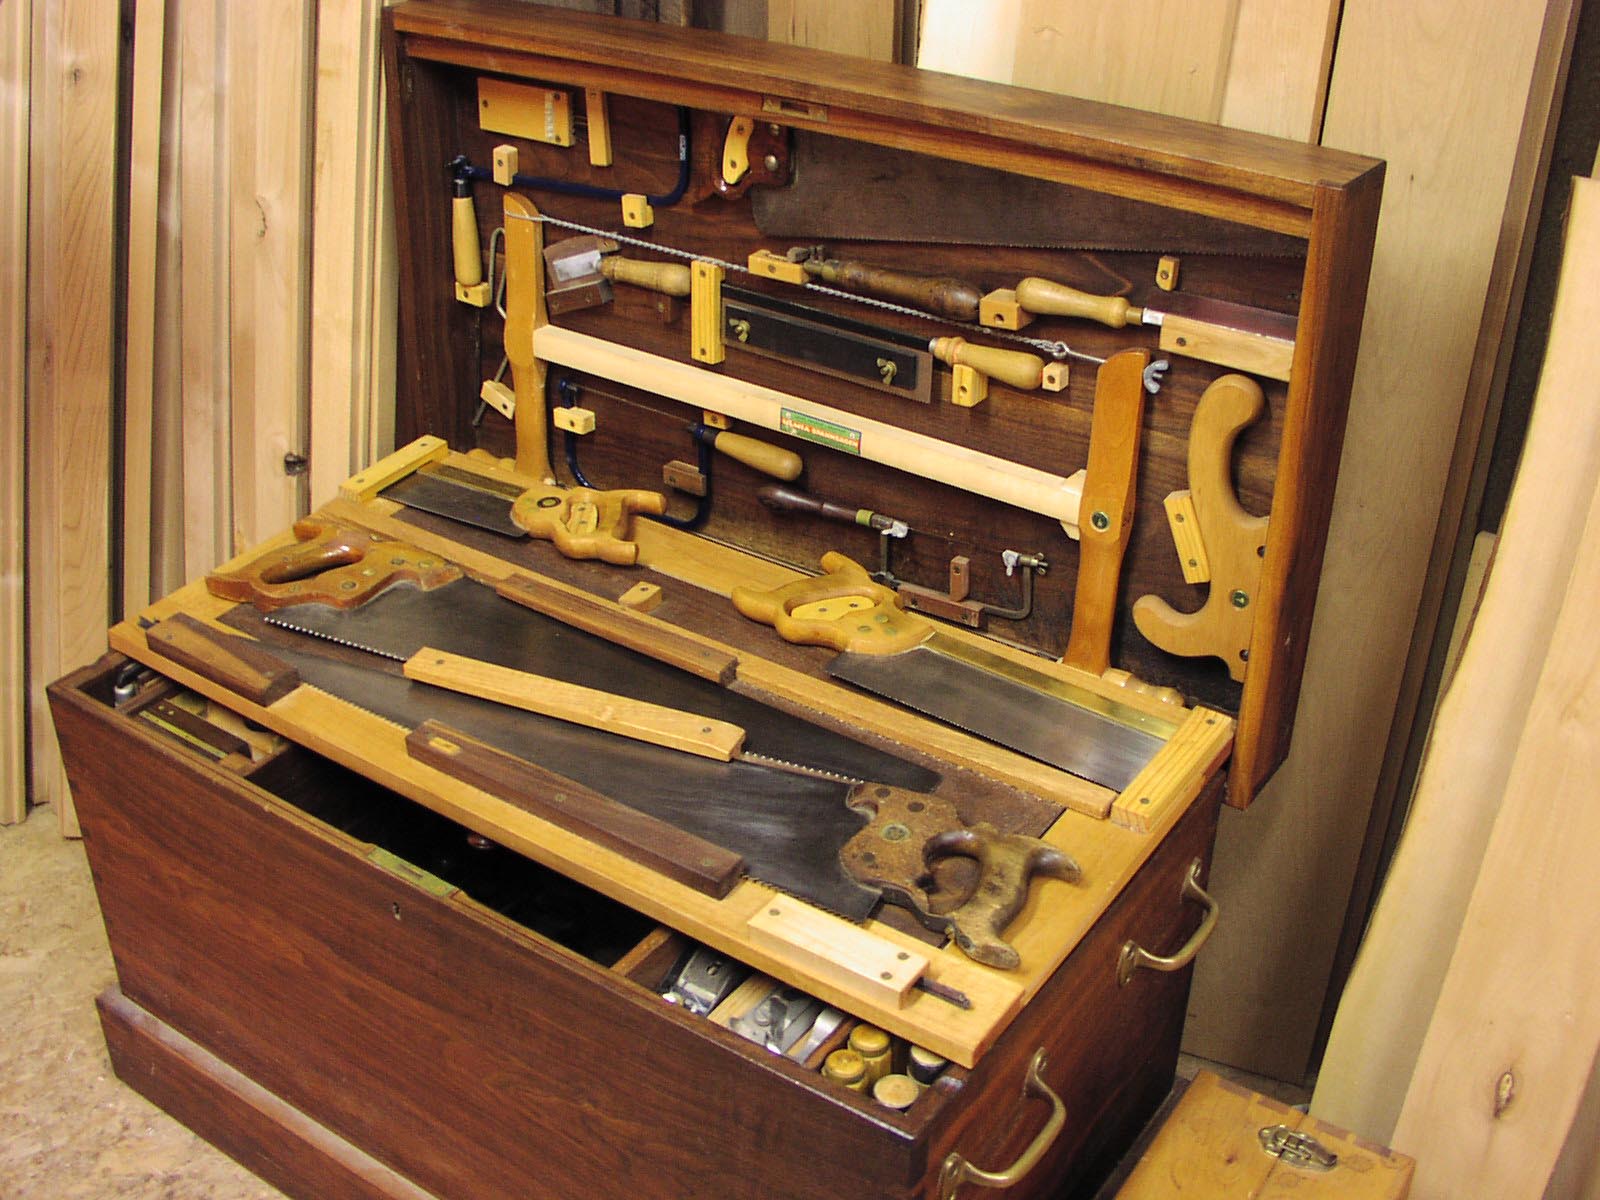
All of my saws fit behind or on a hinged panel attached to the lid. To keep the heavy lid from tearing the hinges out I added two hinged supports to the back of the chest that allow the lid to lean back slightly.
While you could call my box portable, it must be partially emptied in order to move it. It weighs in excess of 300 lbs so it takes four men and a boy to lift. I did install handles but these mostly get used to shift it around on the floor when needed.
More Than a Box
I use my toolbox for more than just tool storage; it is also an example of my work. A business card of sorts and a place to show people just what I am capable of.
There are numerous types of wood in my toolbox. The majority of it is made of Walnut and Alder, but you will also find Holly, Manzanita, Pear, Pine, Ebony, Bloodwood, Maple, Quilted Maple, Cherry, Yellow Cedar, Douglas Fir, Mahogany, Jarrah and Purpleheart.
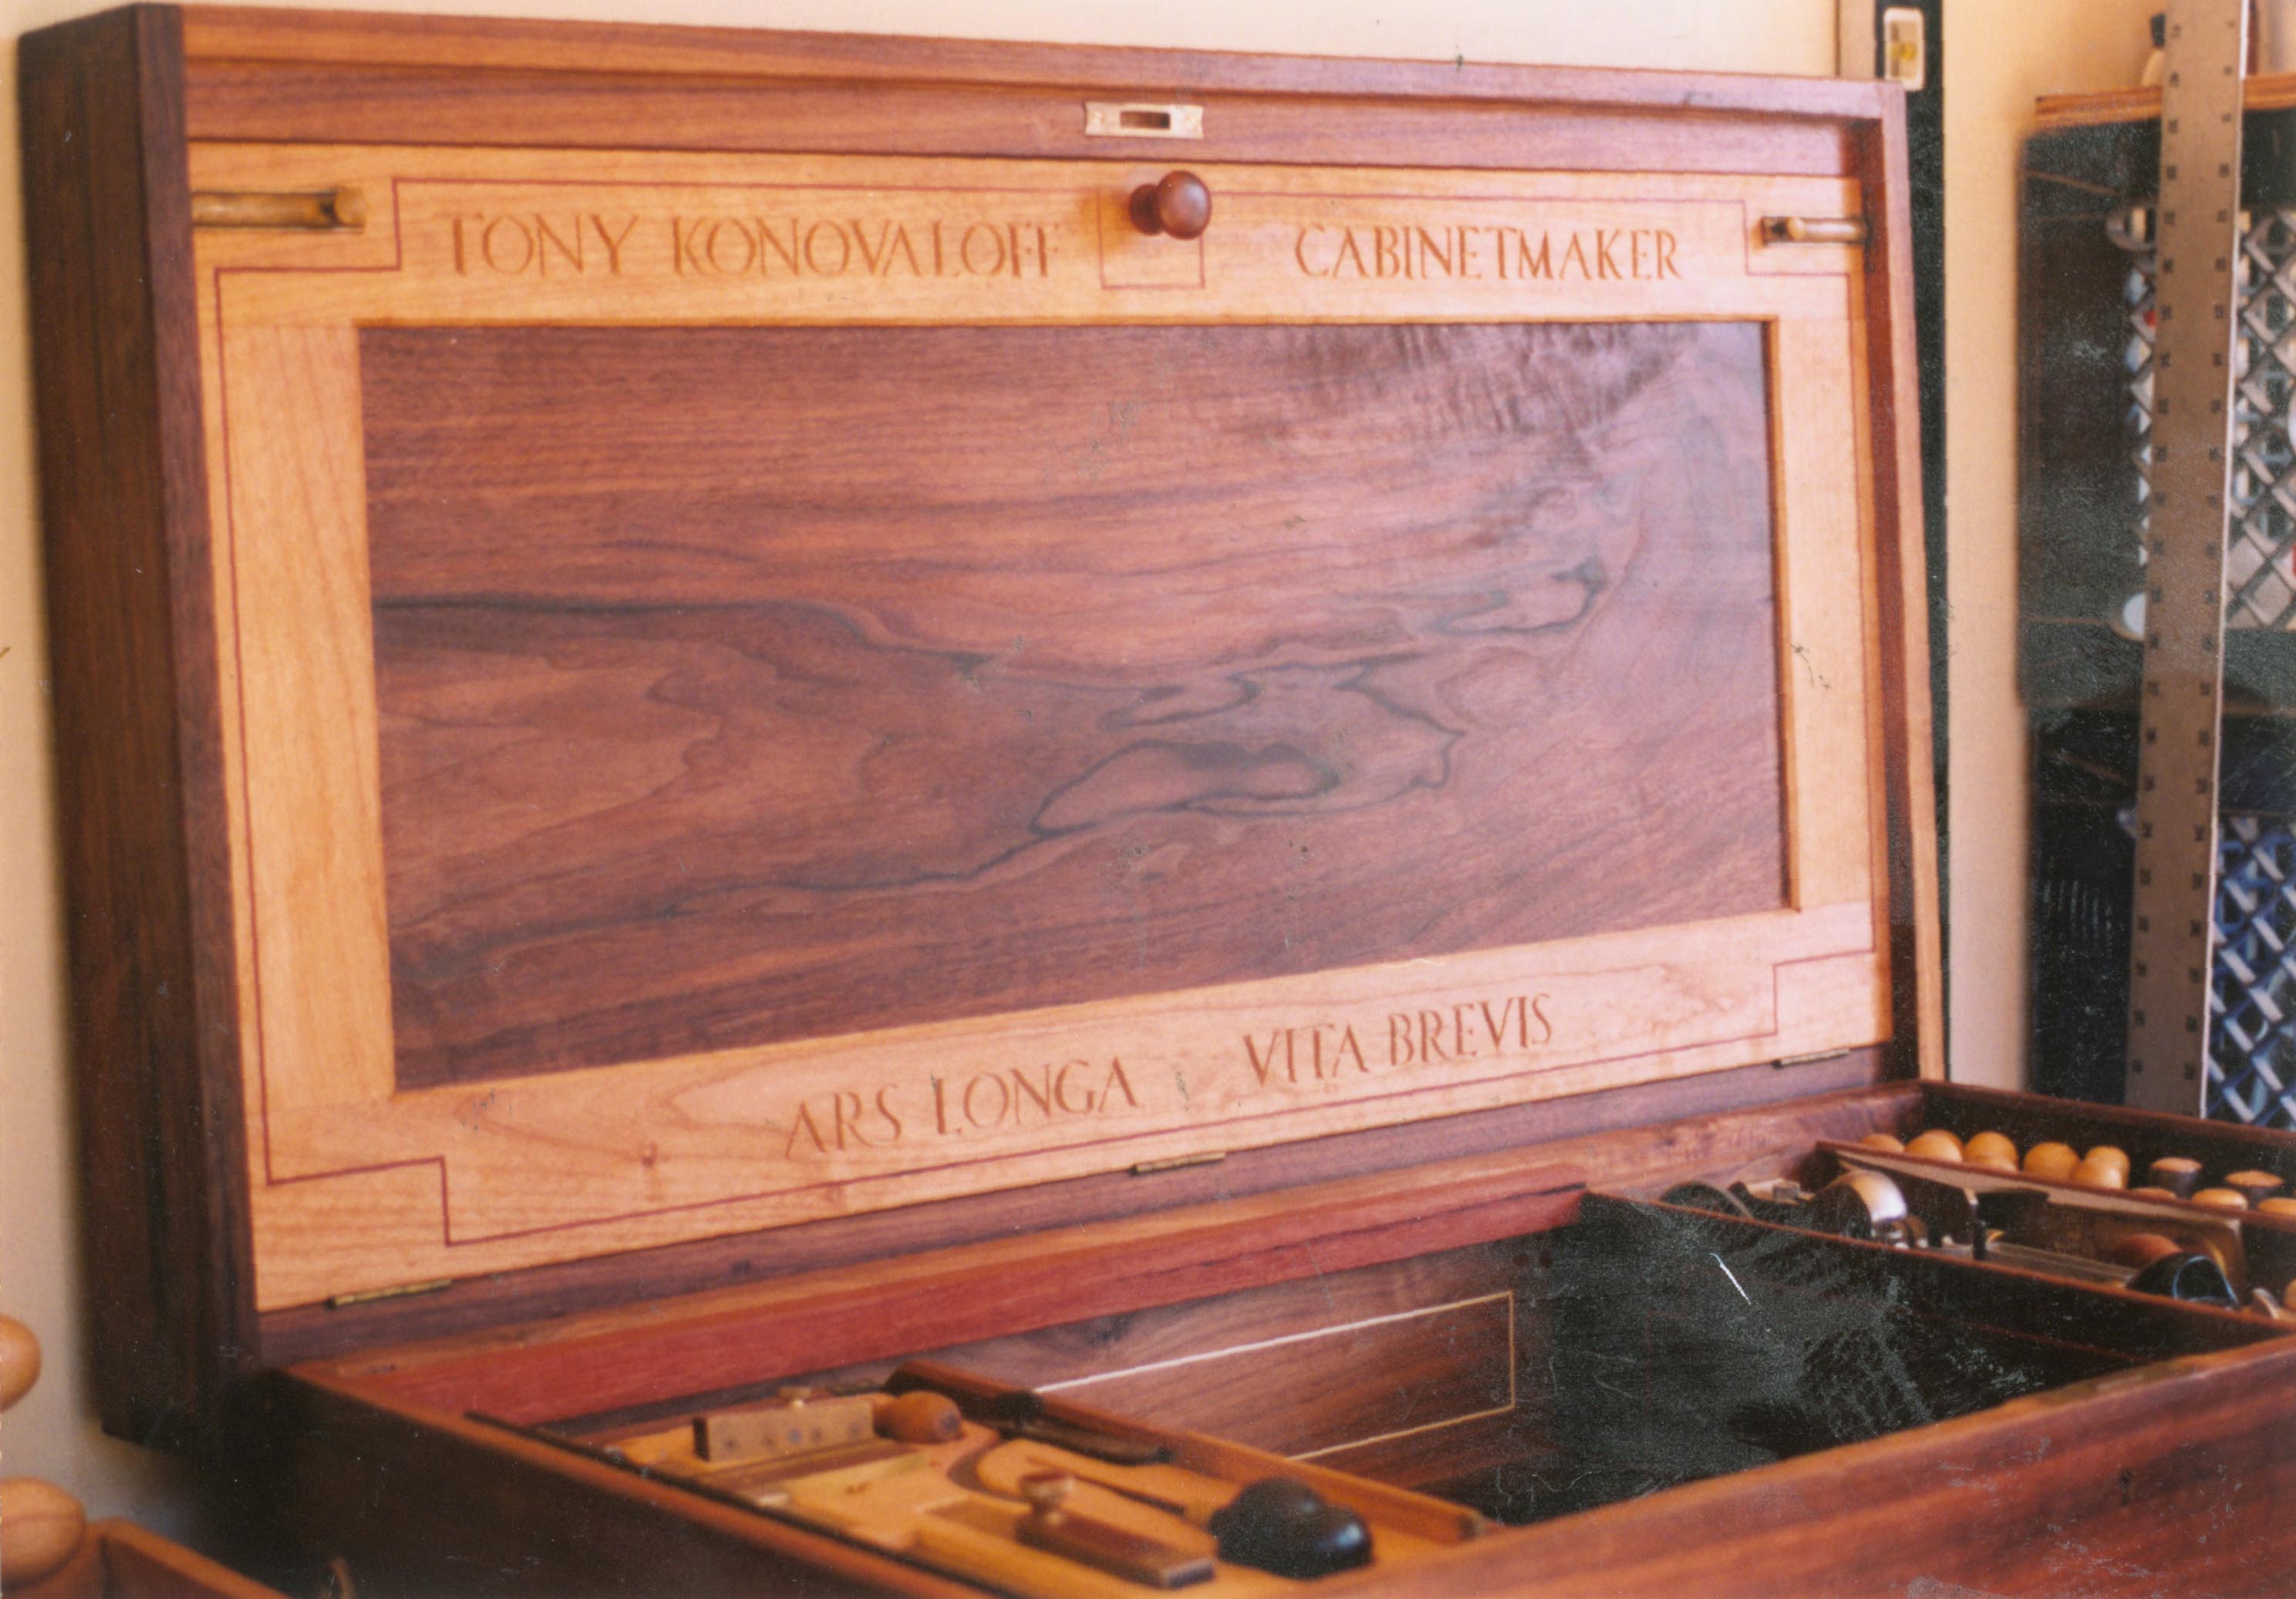 I carved my name and a Latin saying into the inner lid with a chip carving knife and there is over 73 feet of 1/16″ stringing inlaid in various places. The stringing is made of Holly, Pear, Walnut and Manzanita.
There are over 400 hours of labor in this chest and I don’t know if it will ever really be done. I often find little things I want to do and there is still a bit of carving I haven’t done yet….
However you make your chest, do it right. Mistakes, even if others can’t see them, are very apparent to you when you work out of it every day.
What’s in my Toolbox?
Guess you will just have to find a copy of the book to find out….